Loopy Pro Controller
A CircuitPython MIDI controller for Loopy Pro — built from the class hardware kit.
A small custom controller that triggers clips in Loopy Pro over USB MIDI. Tap a button to start or stop a clip; long-press the same button to clear it. The LED on the button follows what Loopy Pro is actually doing, so the controller and the app stay in sync. The slider sends a CC you can map to volume or any parameter you like.
Loopy Simple Controller.lpproj
is included in this folder. Open it in Loopy Pro 2.0 to start with the
four clips already laid out and bound to CCs 20–23. If you'd rather
build it yourself, the walkthrough below shows every step.
The firmware is
loopy_simple.py
— four clips in one row, each NeoKey triggers one clip, the slider
sends one CC.
Hardware
The same class kit used by every other example:
- Adafruit ESP32-S3 Reverse TFT Feather — runs CircuitPython, has a small color screen on the back.
- NeoKey 1x4 — four mechanical-keyswitch buttons with RGB LEDs, on I2C address
0x30. - NeoSlider — analog slider with four RGB LEDs along its edge, on I2C address
0x38(cut the A3 jumper to move it off the default0x30so it doesn't conflict with the NeoKey). - USB cable to your iPad / Mac running Loopy Pro.
Installation
- Copy
loopy_simple.pyto yourCIRCUITPY/drive ascode.py. - Copy
loopy_sprites.bmpalongside it. (This is the screen graphic.) - Make sure your
lib/folder has the Adafruit libraries the file imports:adafruit_simplemath,adafruit_seesaw,adafruit_neokey,adafruit_midi,adafruit_imageload. - Make sure USB MIDI is enabled in your
boot.py— see the Adafruit guide.
MIDI mapping
Default CC assignments (Control Change numbers 20–23 are unassigned in the MIDI spec, so they're safe to use for custom controllers):
| Control | CC | Loopy Pro clip color |
|---|---|---|
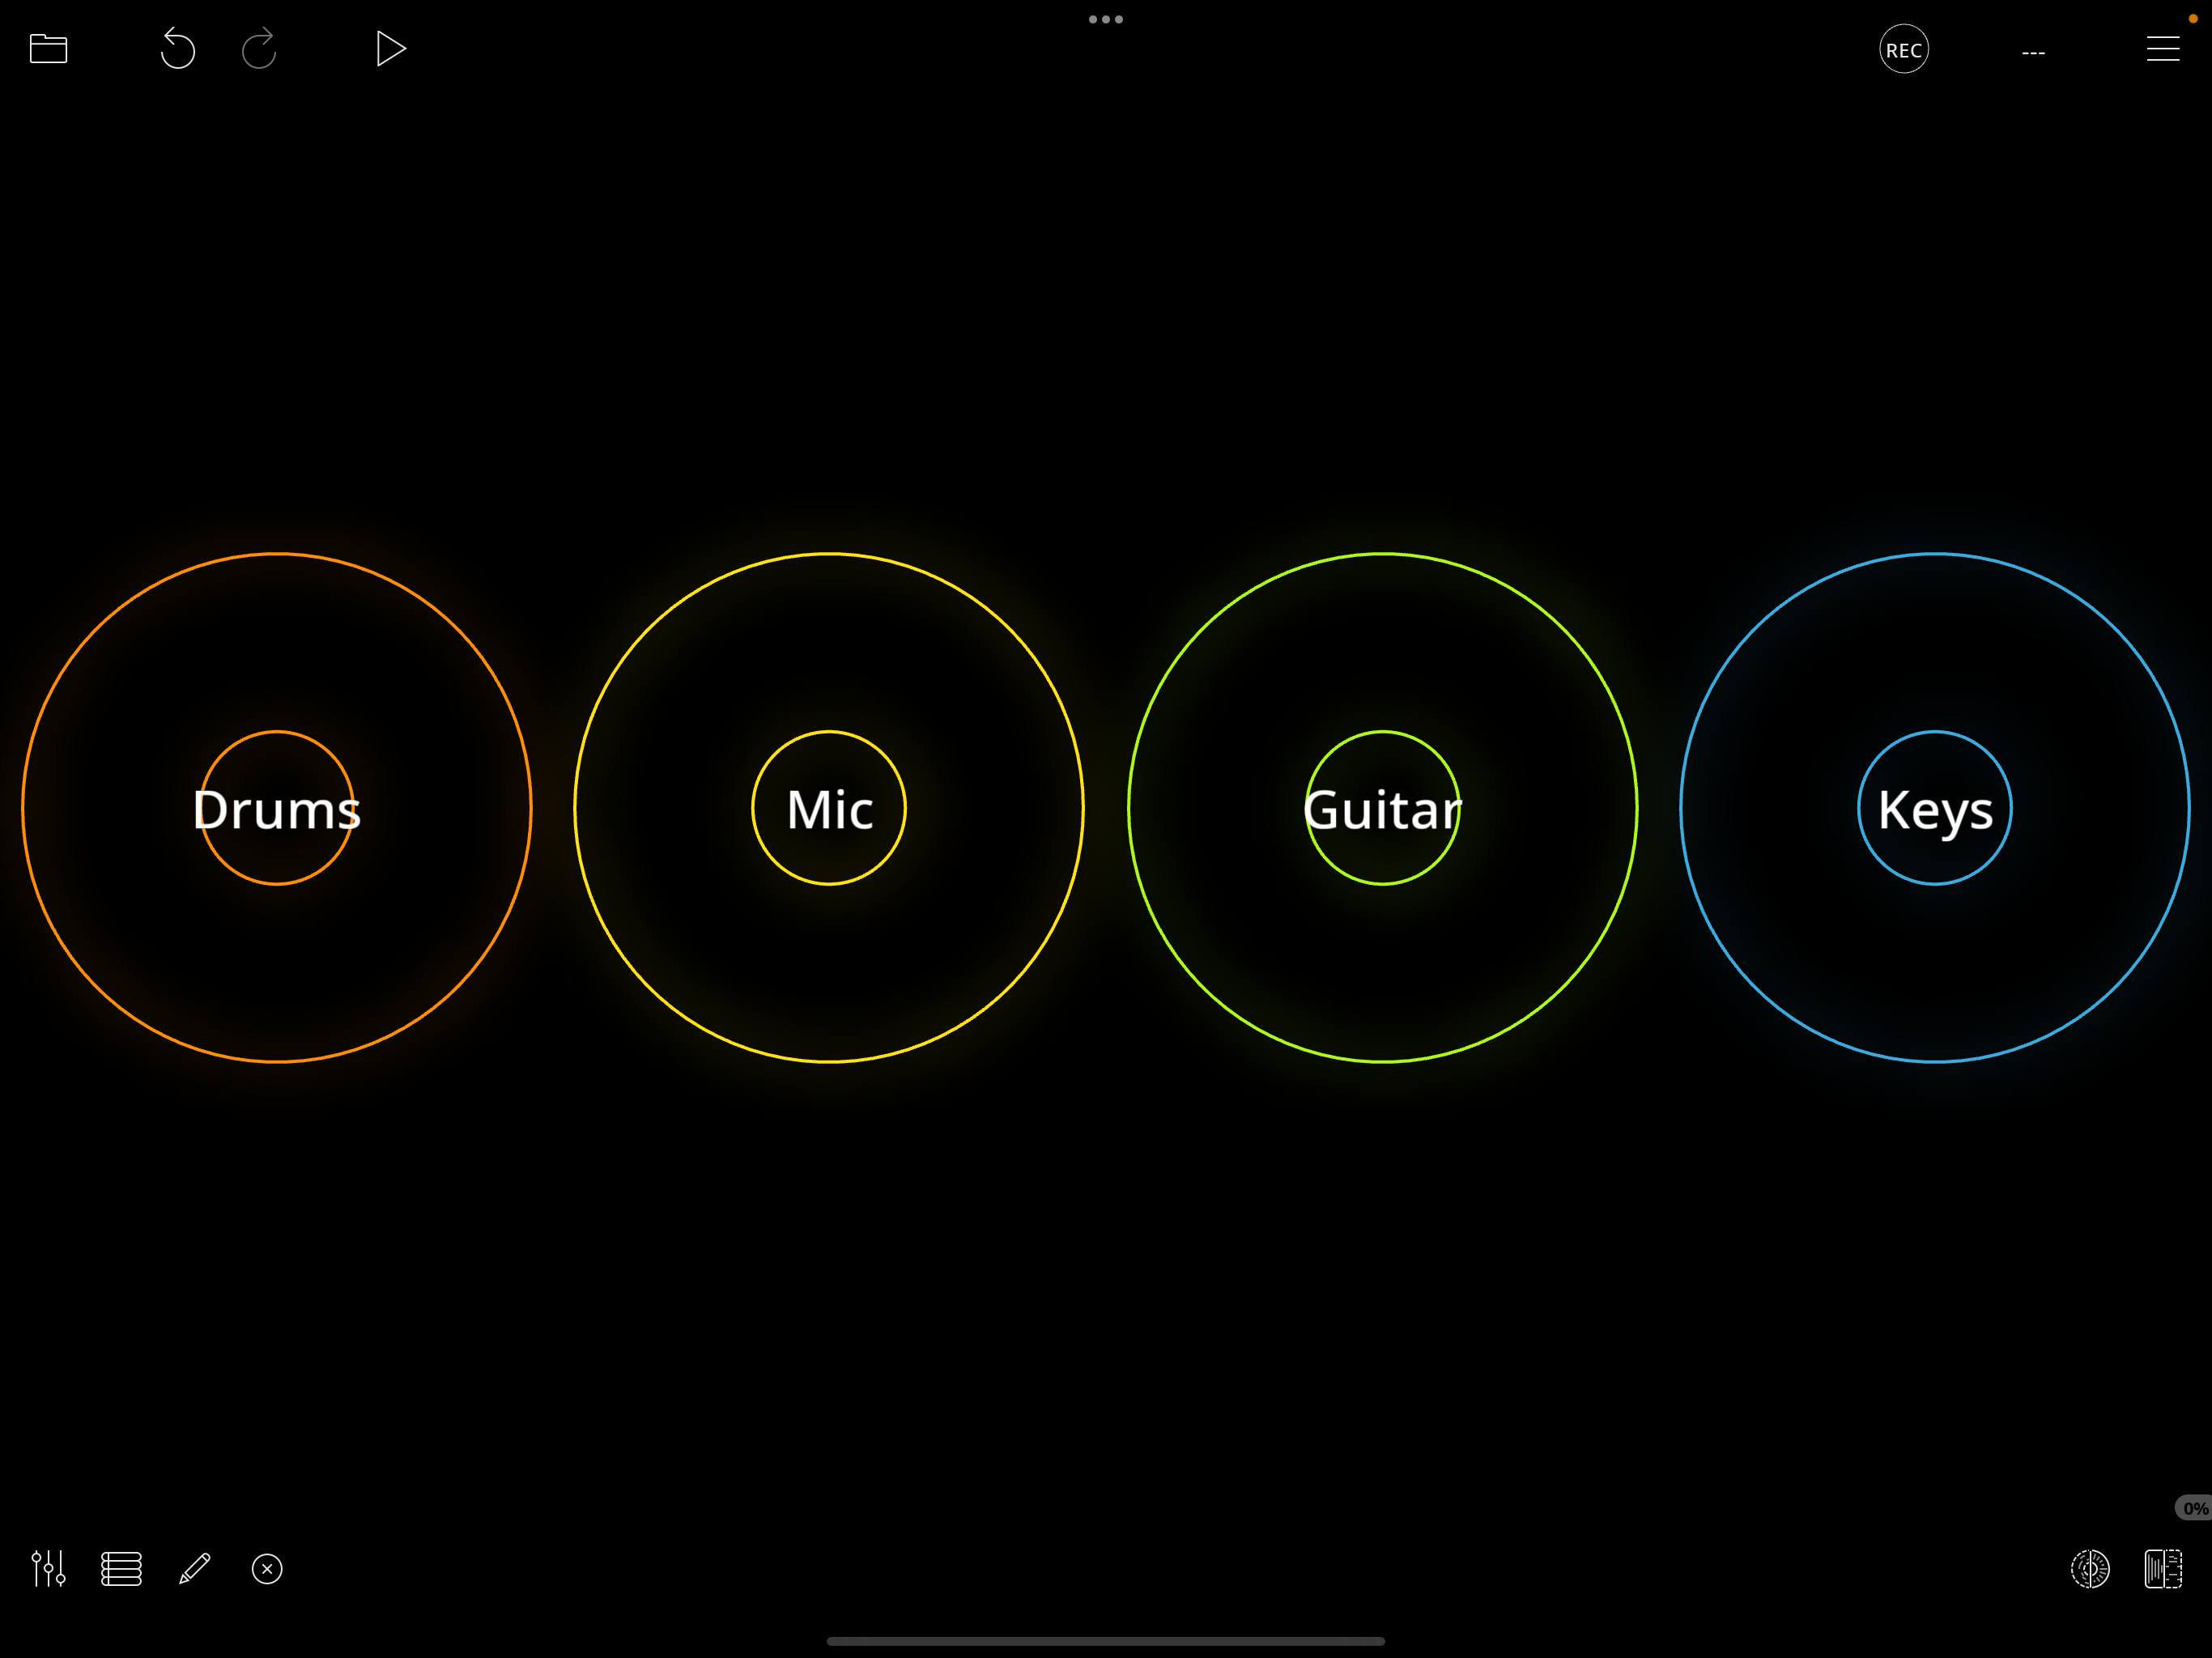
| Button 0 (Drums) | 20 | orange |
| Button 1 (Mic) | 21 | yellow |
| Button 2 (Guitar) | 22 | lime |
| Button 3 (Keys) | 23 | blue |
| Slider | 7 | (Volume) |
ON / OFF events
Following the convention from the Loopy Pro wiki:
- ON event = CC value greater than 0. The controller sends
127, which the wiki recommends as the preferred value. - OFF event = CC value
0.
Pressing a button sends ON; releasing sends OFF. Loopy Pro echoes the same CC back when a clip starts (ON) or stops (OFF) — that's what lights up the corresponding NeoKey.
Setting up the mapping in Loopy Pro 2.0
If you opened the included
Loopy Simple Controller.lpproj,
everything below is already done — you can skip ahead to
What the lights and screen show.
Otherwise, here's how to build the same mapping yourself.
1. Plug the controller in
Loopy Pro picks up USB MIDI devices automatically — no settings dialog needed.
2. Enter MIDI Learn mode
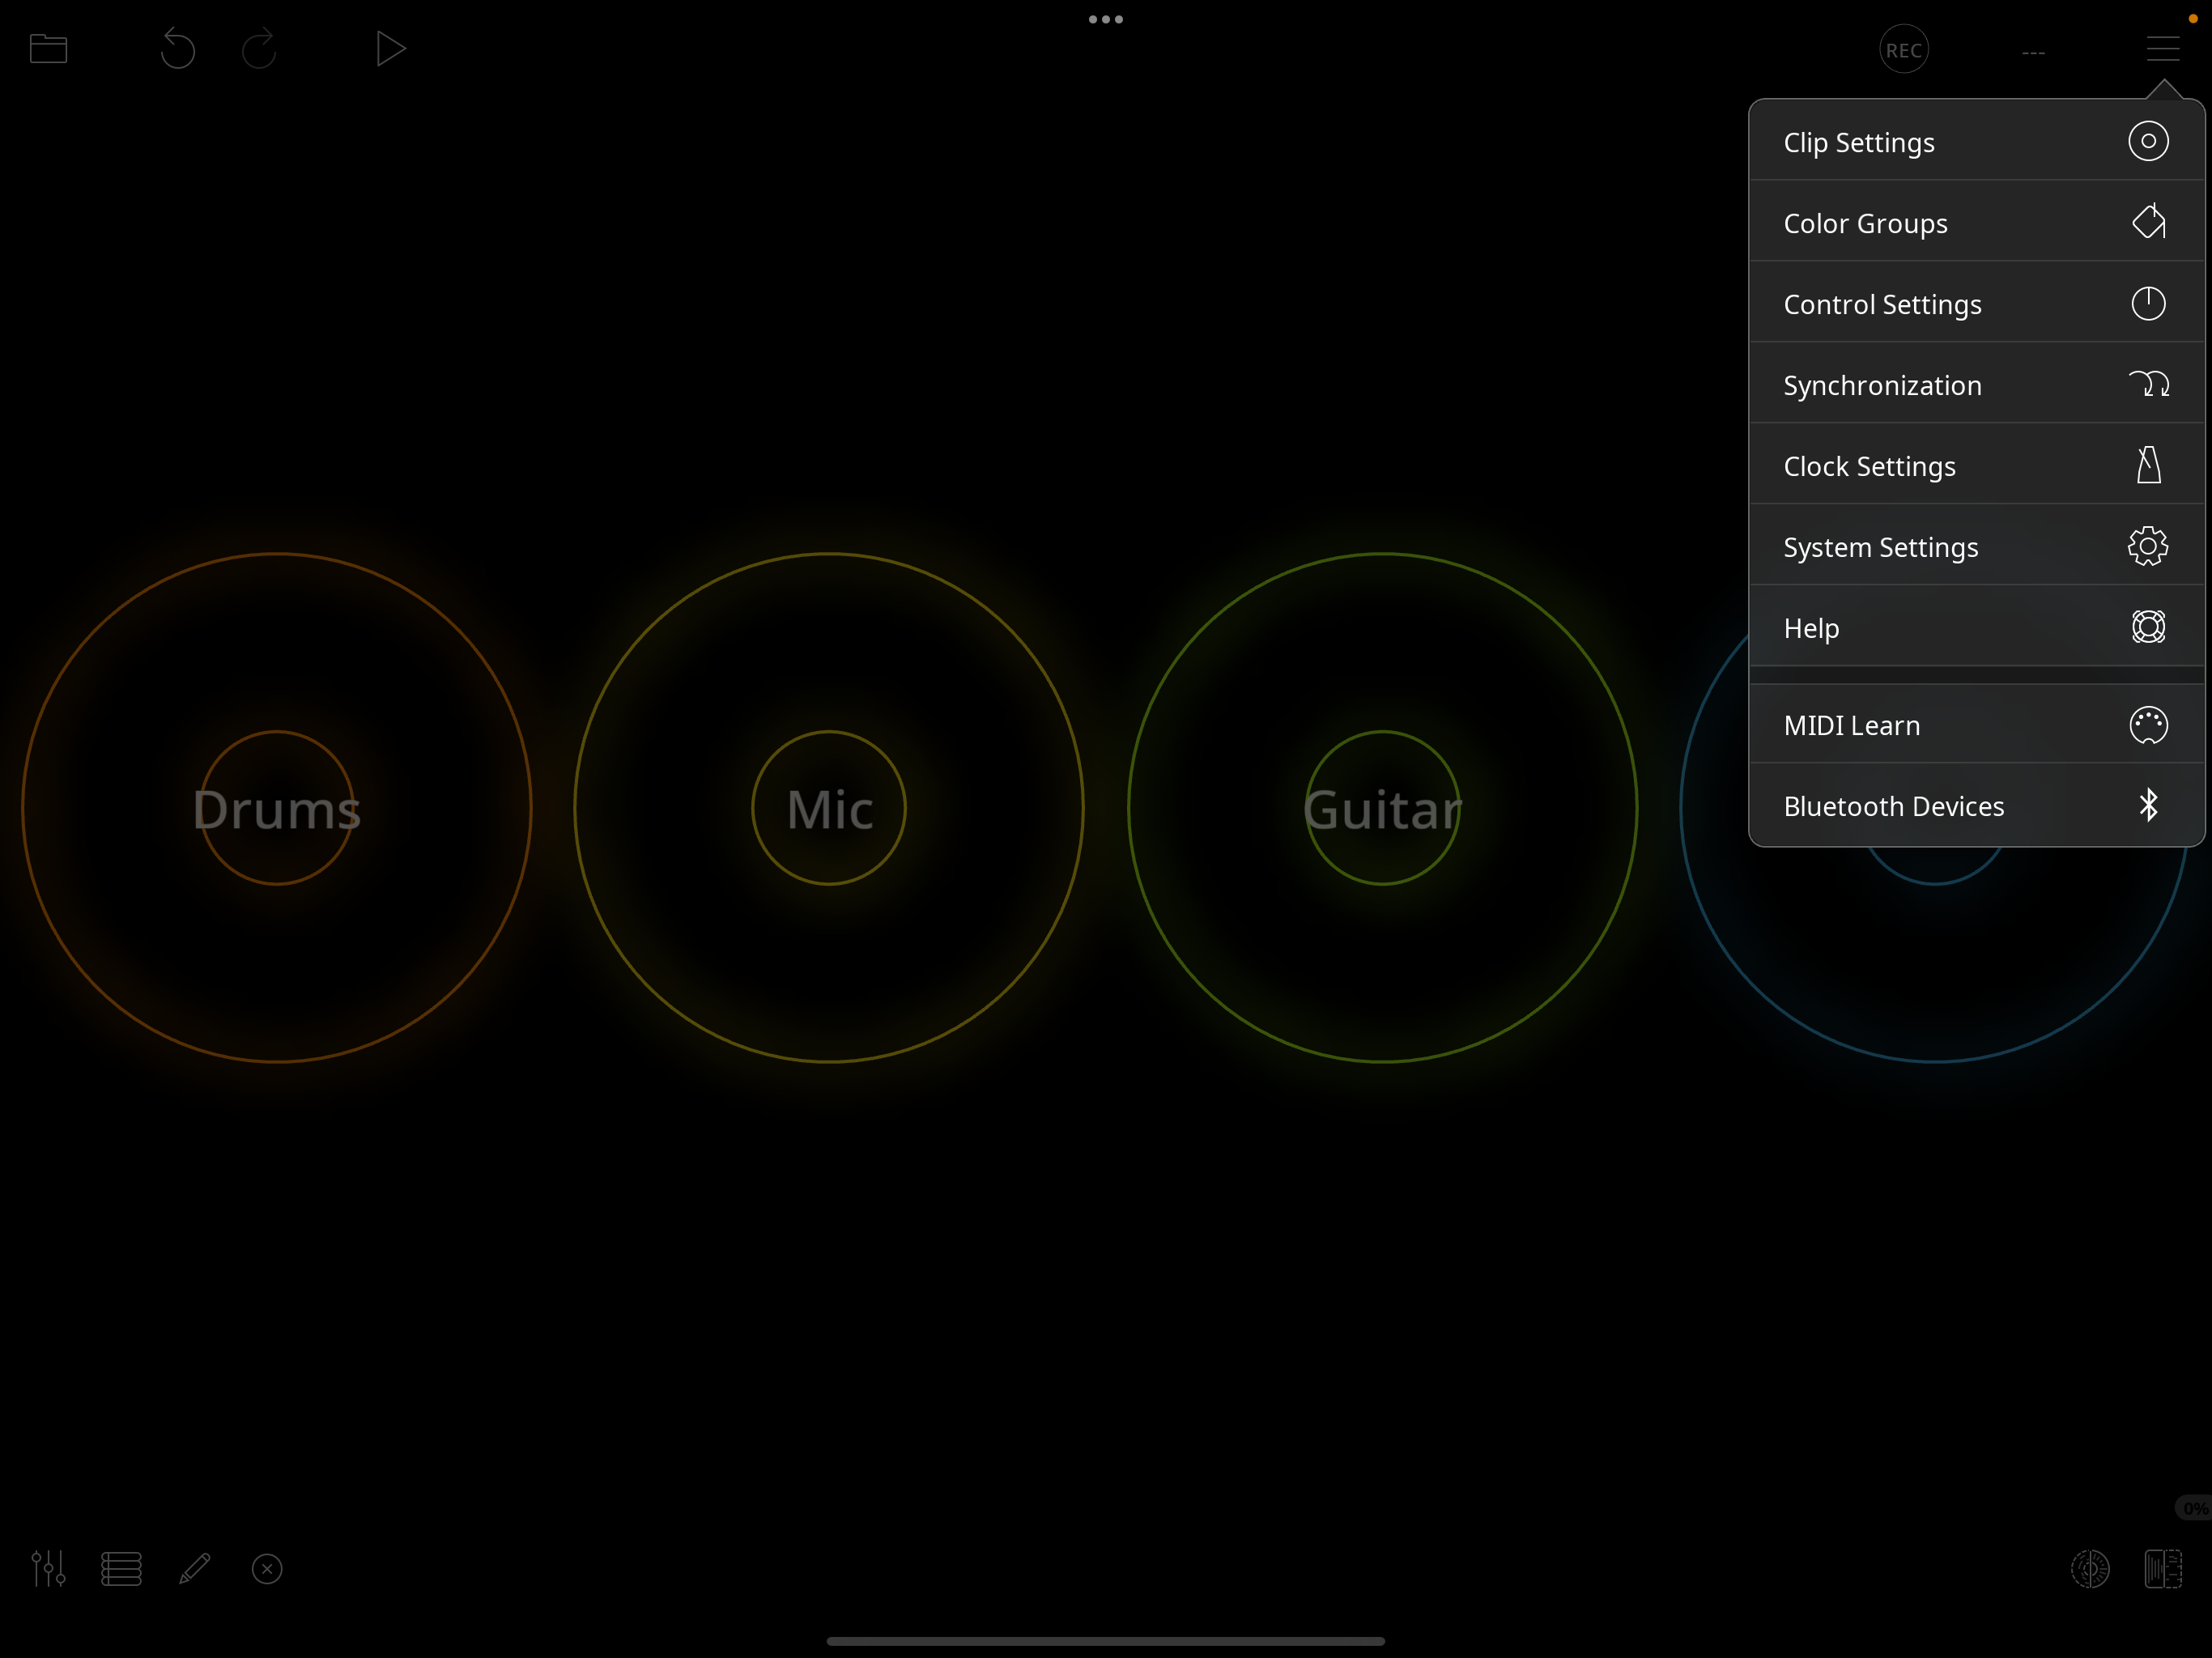
Tap the hamburger icon in the upper right and choose MIDI Learn. A MIDI Learn panel appears along the bottom of the screen and the title bar changes to MIDI Learn.
3. Map Play/Stop to the button's On message
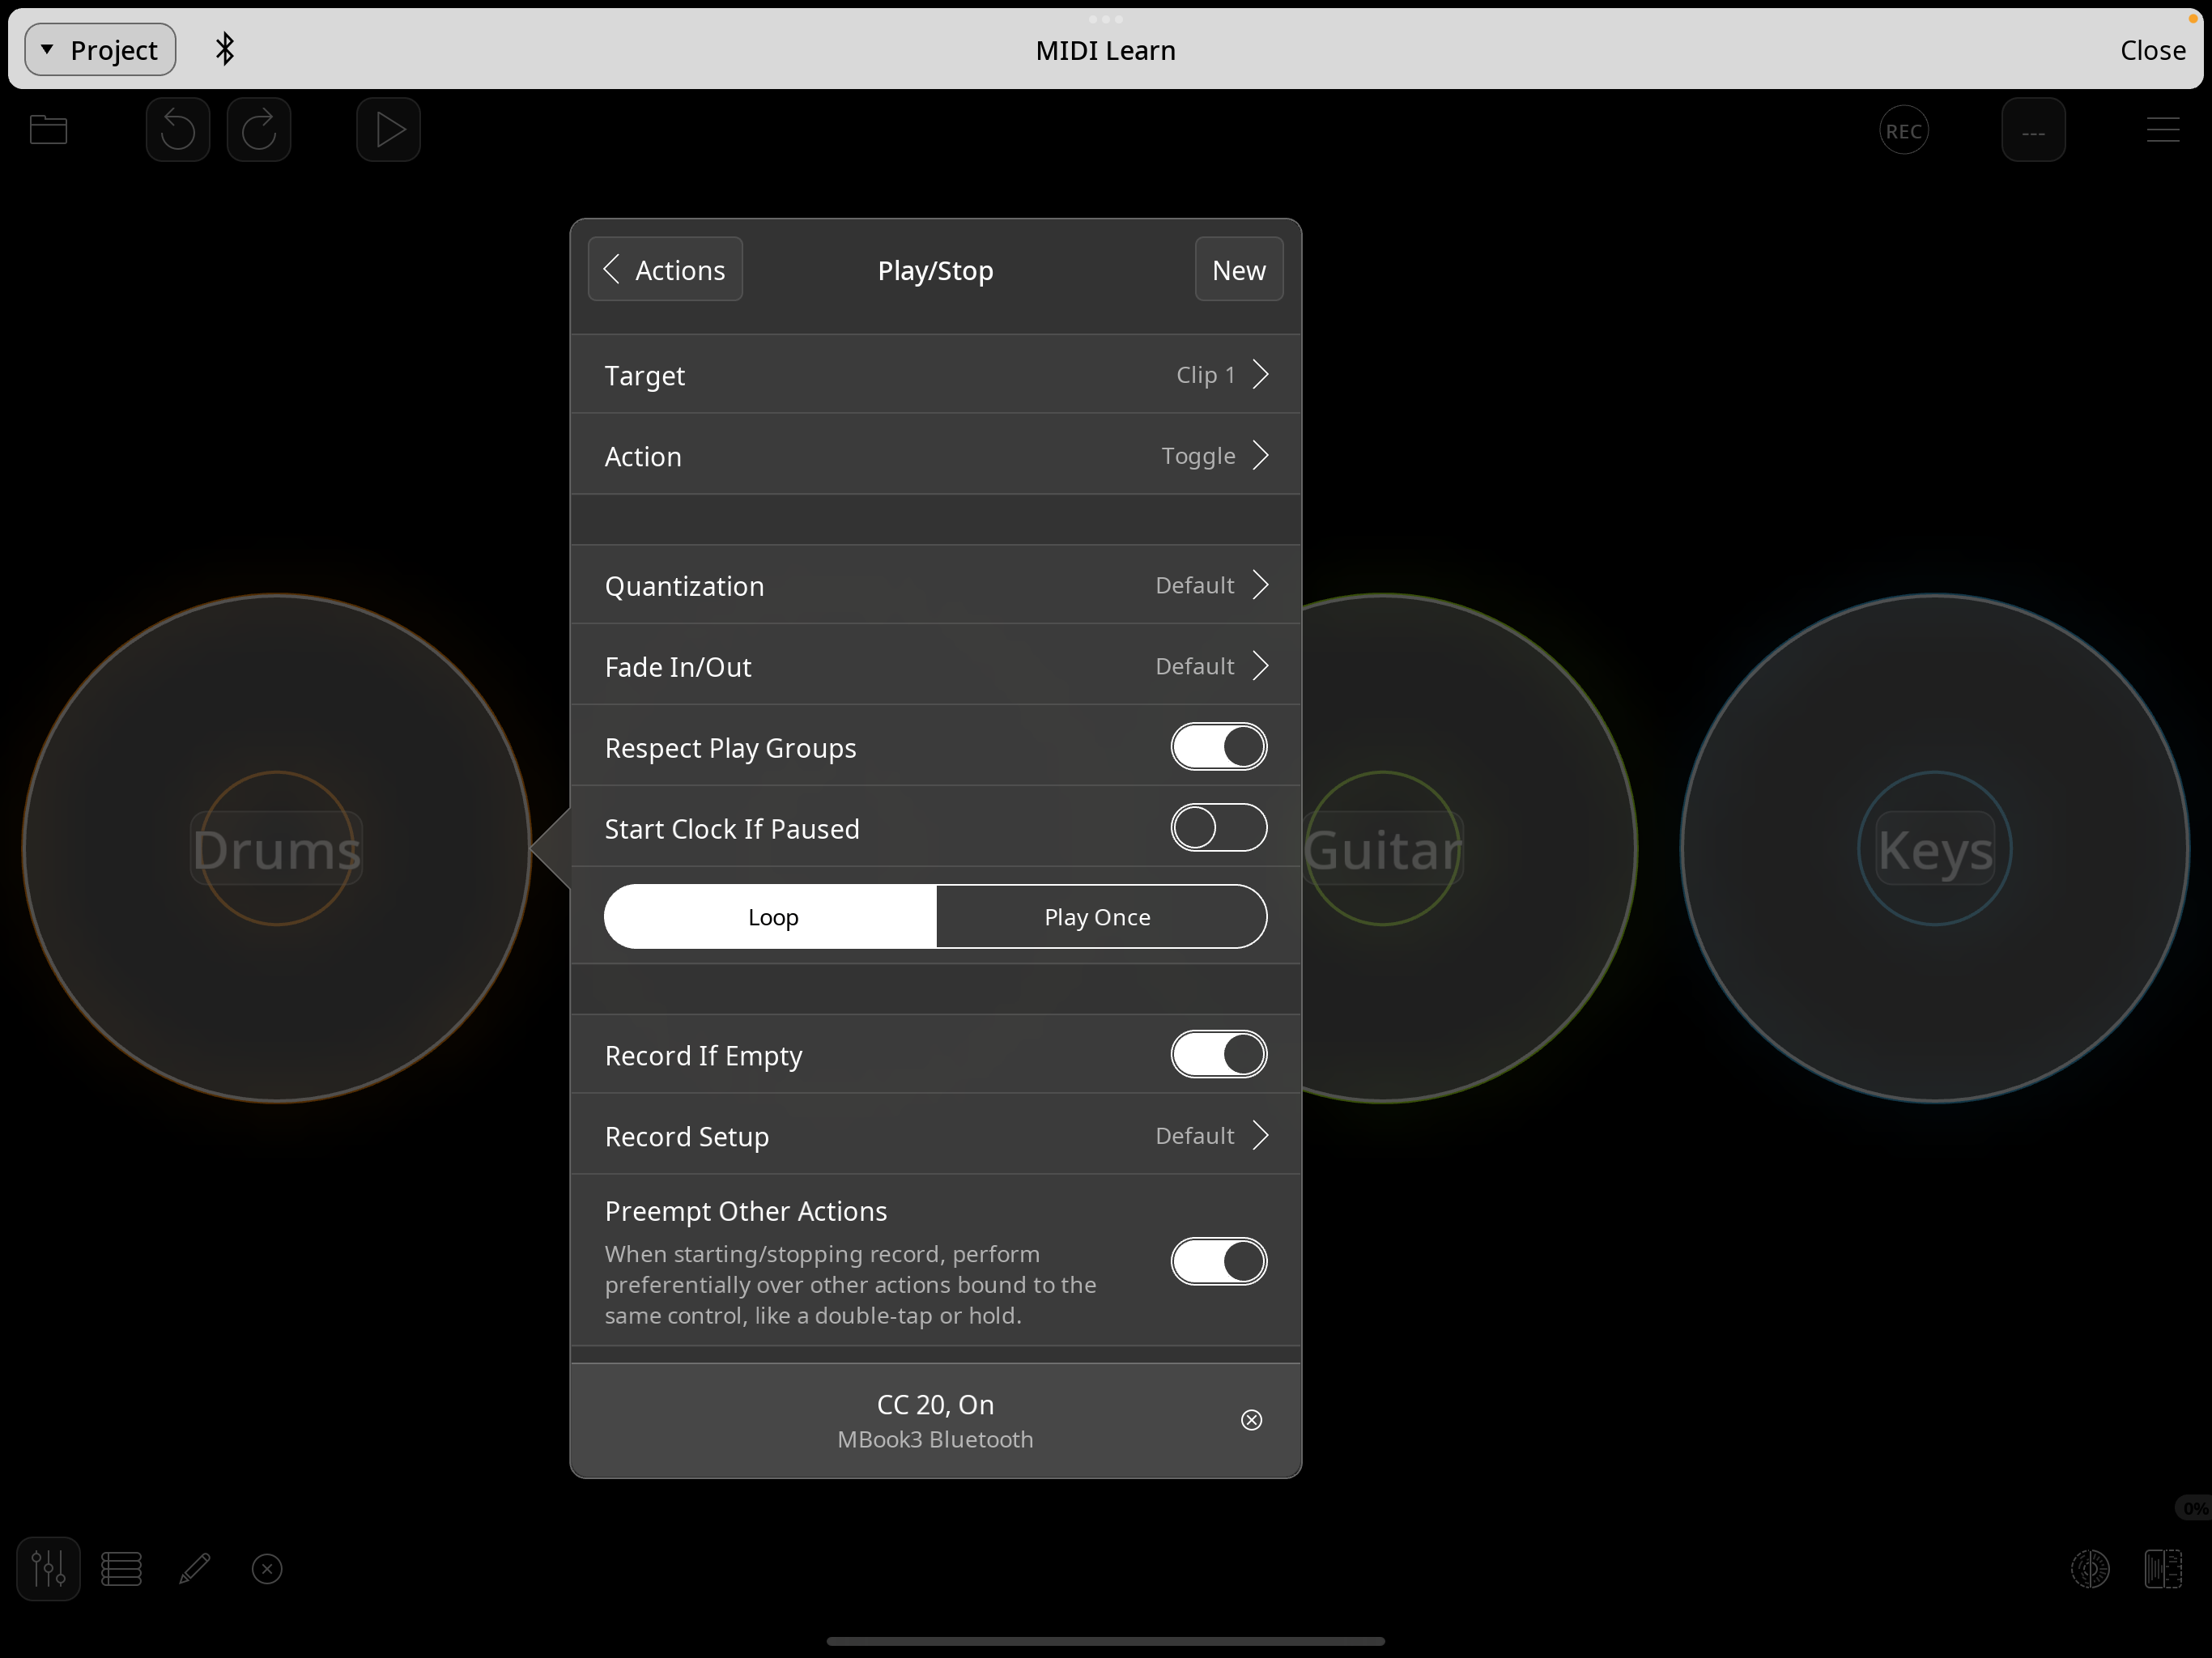
Tap the first clip. Choose the Play/Stop action. In the binding panel set Action to Toggle — one tap starts the clip, the next tap stops it. Then press the matching NeoKey button briefly. Loopy Pro learns the binding as CC 20, On (the controller's ON event = CC value 127).
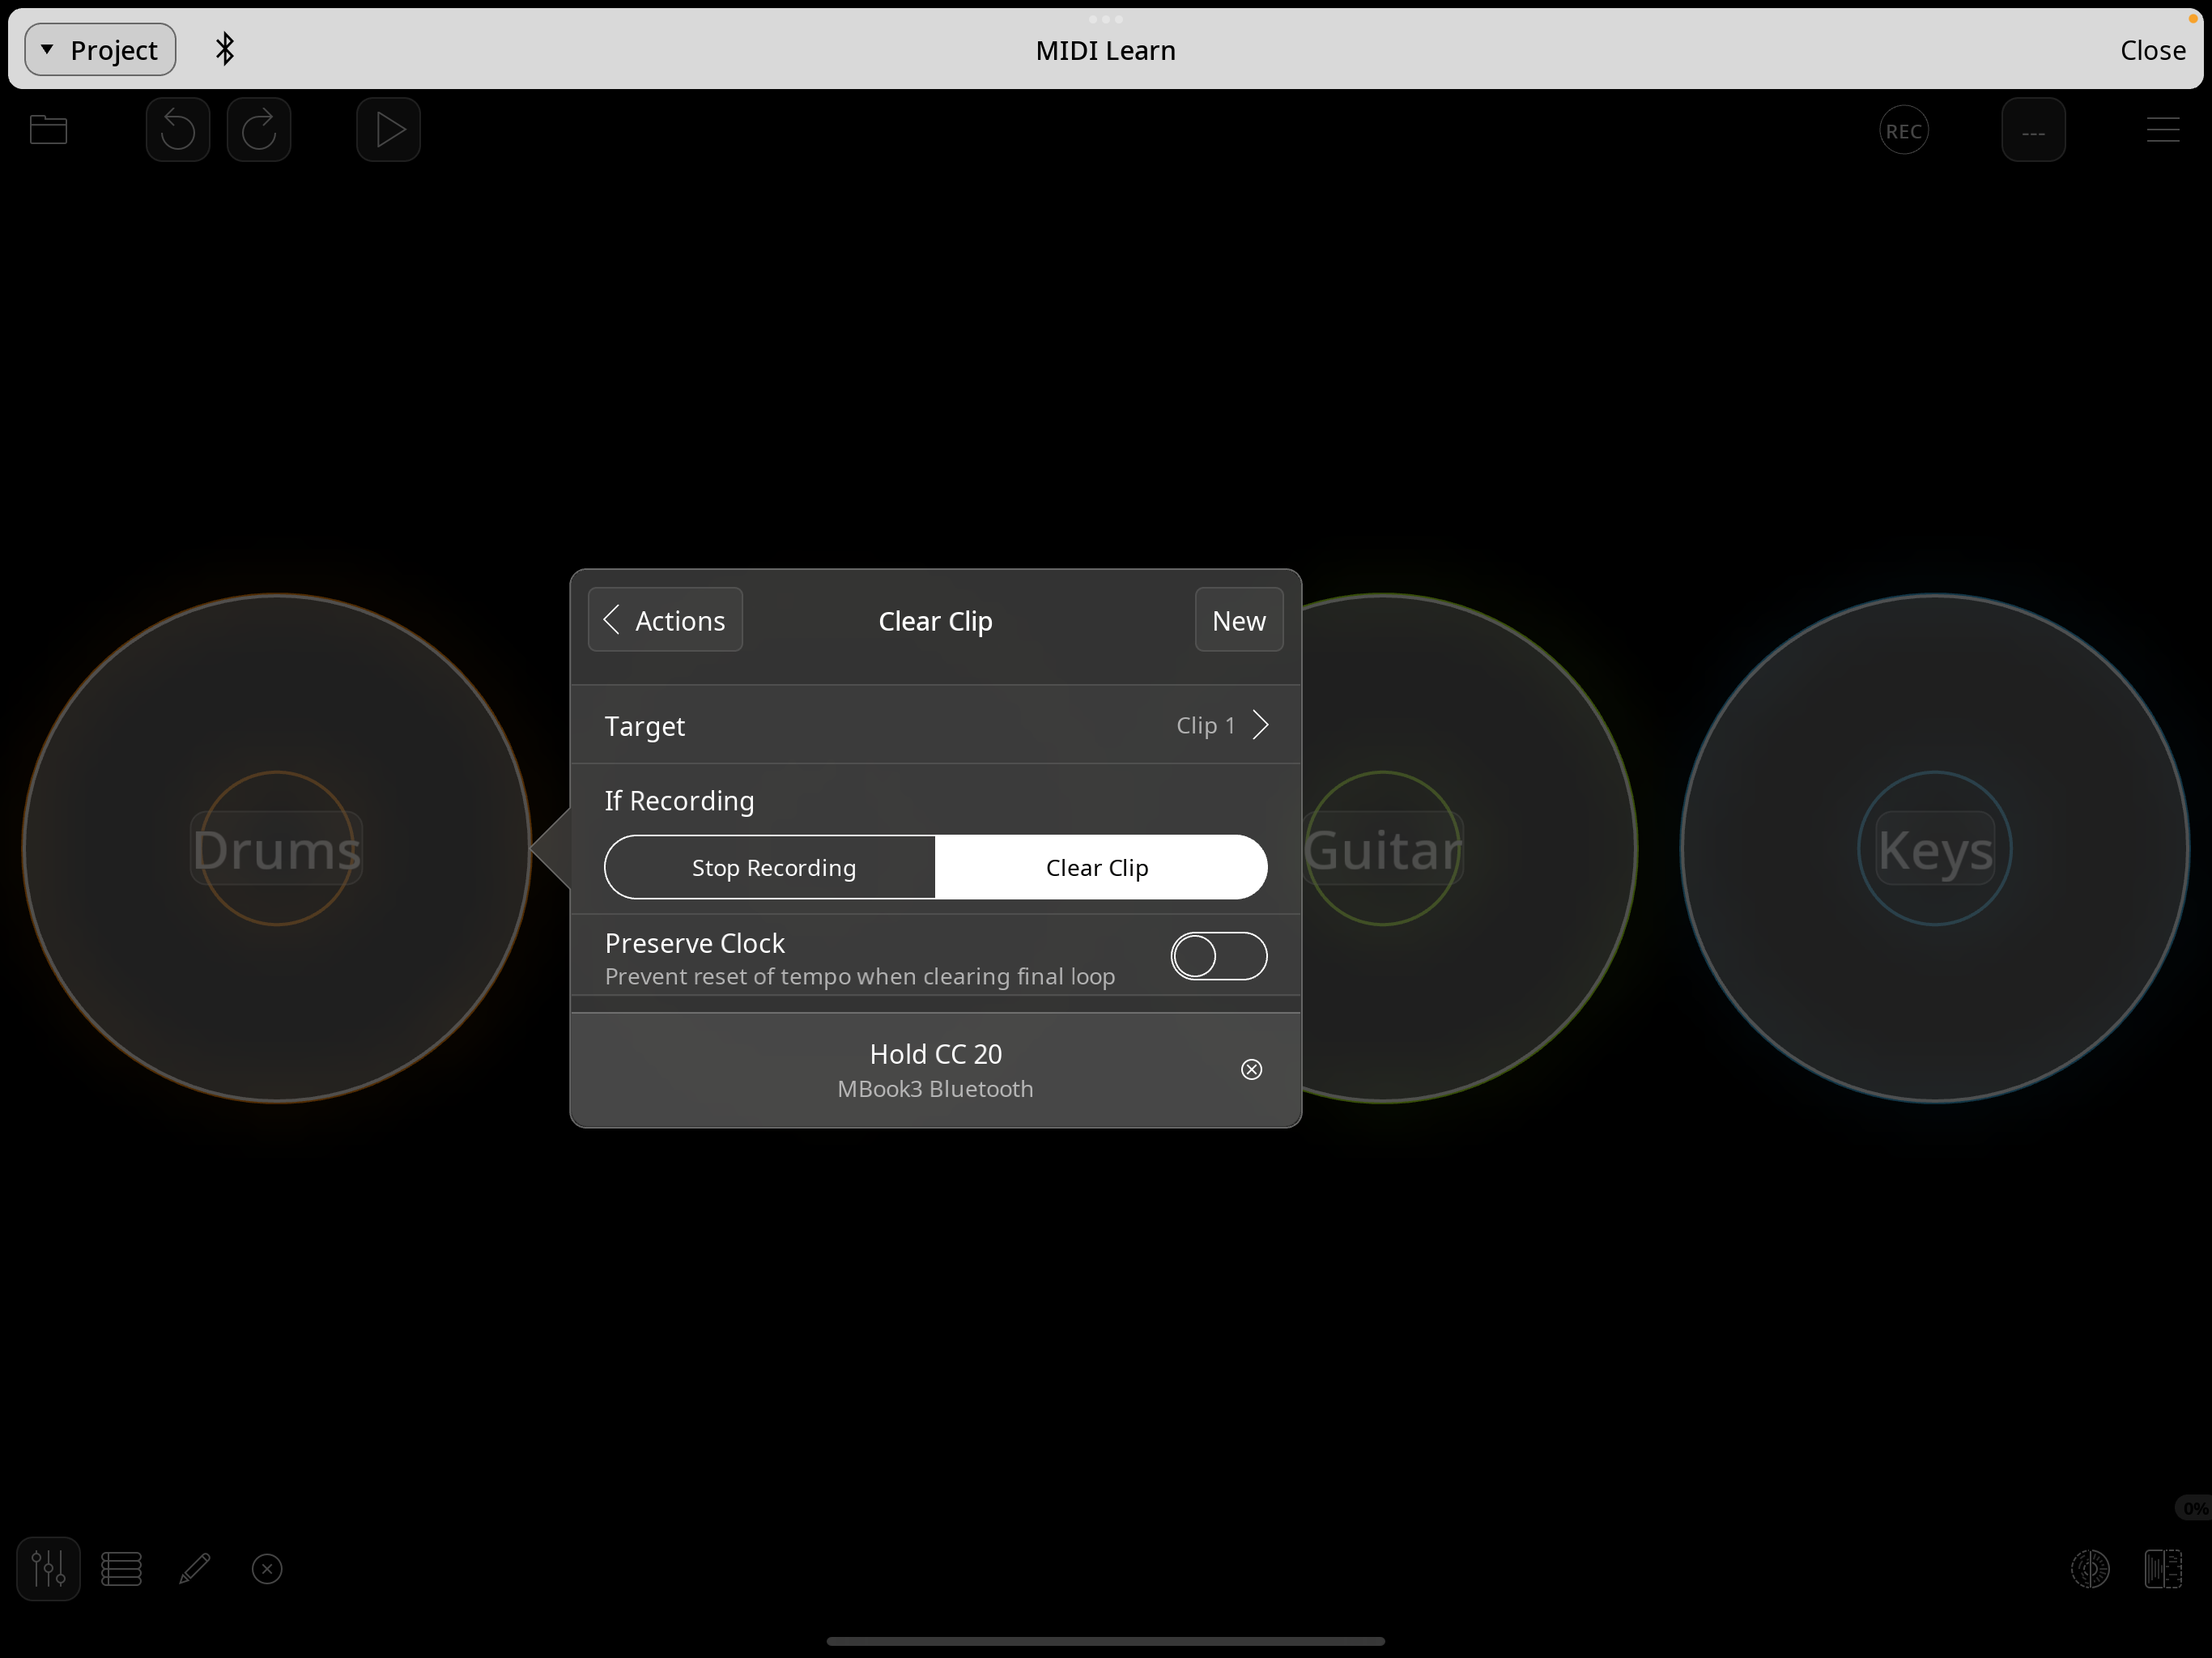
4. Add a second action: Clear Clip on Hold
Still in the same clip's bindings, add a new action and pick Clear Clip from the list. This time, instead of tapping the NeoKey button, press and hold it. Loopy Pro detects that the ON didn't release quickly and learns the binding as Hold CC 20. Now a tap toggles play, and a long-press of the same button clears the clip — two actions on one button.
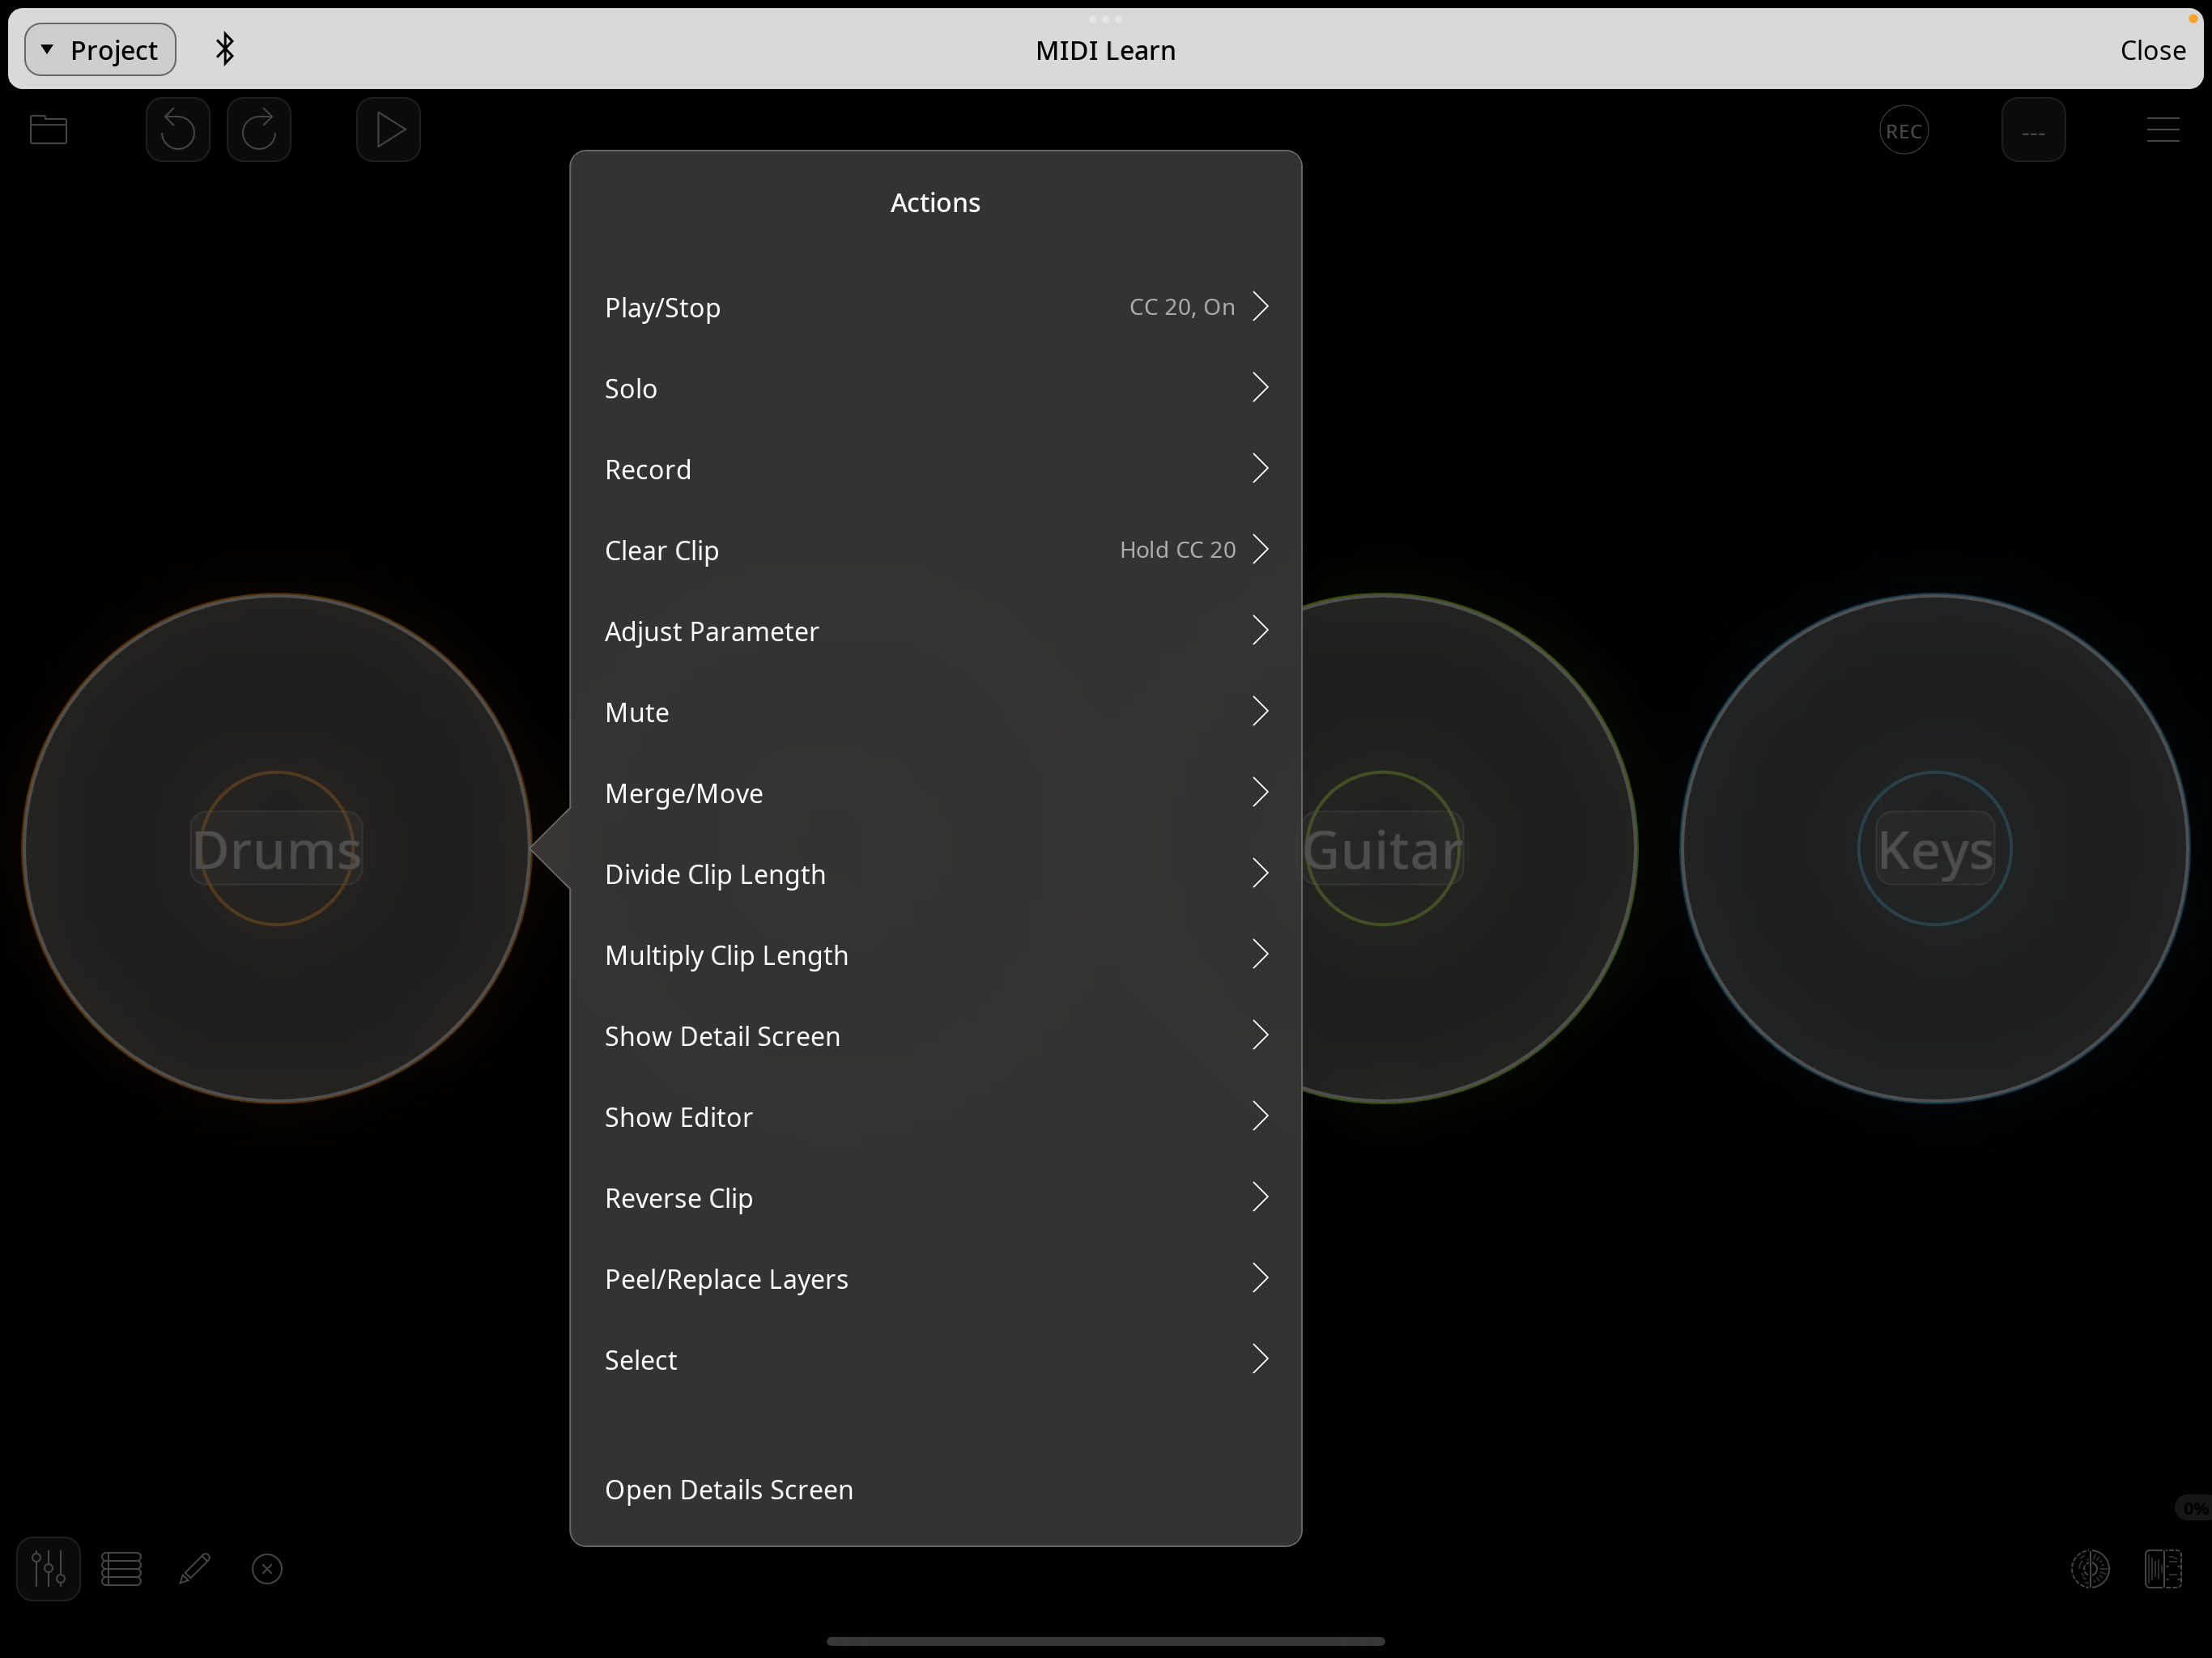
CC 20, On; Clear Clip will be bound to Hold CC 20.
5. Repeat for the other three clips
Mic uses CC 21, Guitar CC 22, Keys CC 23. For each clip, do steps 3 and 4: Play/Stop on the On event, Clear Clip on the Hold event. Feedback (the CC echoed back to light up the NeoKey when the clip plays or stops) is sent automatically — no extra option to enable.
6. Map the slider
Still in MIDI Learn mode, tap the master volume fader (or any knob you want) and move the slider on the controller. Loopy Pro learns CC 7.
7. Exit MIDI Learn
Hamburger icon → MIDI Learn again, or tap Close in the upper right. That's it. Tap a button to toggle the clip; hold a button to clear it; the lights follow what Loopy Pro is doing.
What the lights and screen show
- NeoKey LEDs. Each button lights bright in its column color when its clip is playing, dim when stopped. The LED state is driven only by feedback from Loopy Pro, so what you see is what Loopy Pro is actually doing — not what you tried to do. If a button press doesn't light its LED, the routing back to the controller isn't working.
- NeoSlider LEDs. Fill with a color that follows the slider's position — useful as a quick visual confirmation that the slider is being read.
-
Screen sprite. Four little vertical "VU" bars showing exactly
which clips are currently playing. The sprite sheet has 16 tiles — one
per combination of running clips — chosen by a 4-bit bitmask of the
playing state. So if drums and guitar are running, the screen shows tile
0b0101= 5: drums and guitar bars bright, voice and keys dim.
Customizing
Different CC numbers
Edit CLIP_CCS near the top of loopy_simple.py. The
SLIDER_CC constant just below it controls the slider's CC.
Different colors
Edit CLIP_BRIGHT and CLIP_DIM. The defaults match
Loopy Pro's standard clip palette (orange, yellow, lime, blue) so the
physical buttons match what's on screen in the app.
Different sprite
The 16 tiles are generated by
Scripts/generate_loopy_sprites.py
using only Python's standard library. Edit the palette or
state_tile() function to change the look, then re-run:
python3 Scripts/generate_loopy_sprites.py
The script writes CircuitPython/loopy_sprites.bmp regardless of where you run it from. Copy that BMP to your CIRCUITPY/ drive.
Files
Loopy Simple Controller.lpproj— the example Loopy Pro project, ready to openCircuitPython/loopy_simple.py— firmwareCircuitPython/loopy_sprites.bmp— screen graphicScripts/generate_loopy_sprites.py— sprite sheet generator
Note: the firmware uses the label "voice" for serial debug
output on button 1; the included project file labels the same clip
Mic. The labels are cosmetic — only the CC numbers
matter for the mapping.